Sunny Balasubramanian
Current quantitative researcher in the crypto & equities space. Formerly at Citadel, AQR, Columbia SEAS '16. Always cracking away at new (sometimes whimsical) problems using different kinds of technology. Please reach out to me at sunny.m.bala@gmail.com if you'd like to chat about any of my prior work or would like to hack on something together. LinkedIn | GitHub
E-Ink Train Display with Python
by
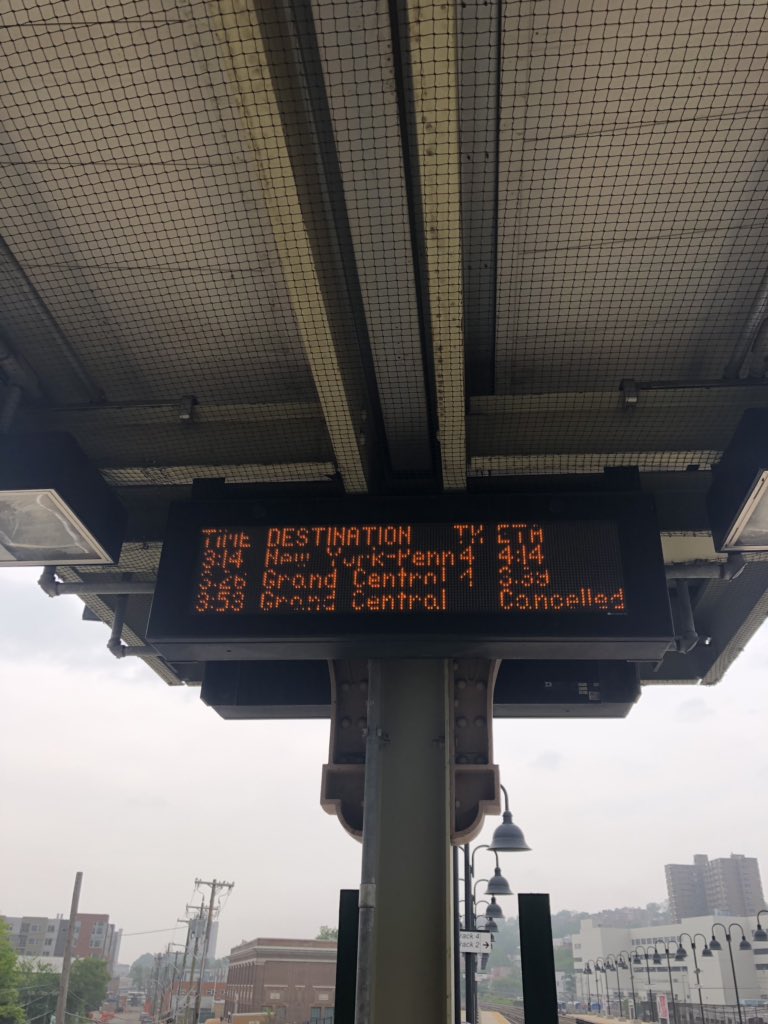
I commute by train to my office every day, so my schedule ends up being tightly coupled to the train schedule. Far too frequently, I make my way to the platform at the end of the day only to see something like this:
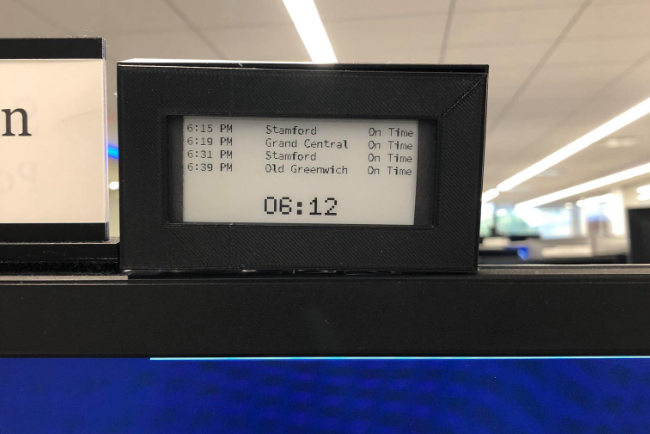
Cancellations and delays. I could check the app every day when I’m thinking of leaving but I wanted to have something I could glance at. I built this little pi-powered gadget to stick above my monitor that grabs the times and keeps me in the loop!
The Plan
Rig up an e-paper display to a raspberry pi, pulling data from the metro-north website.
Hardware Setup
Recipe:
Required Tools:
Optional:
- 3-D Printer to Make a Case
Build
This guide is going to mostly point to other resources that have done a great job already.
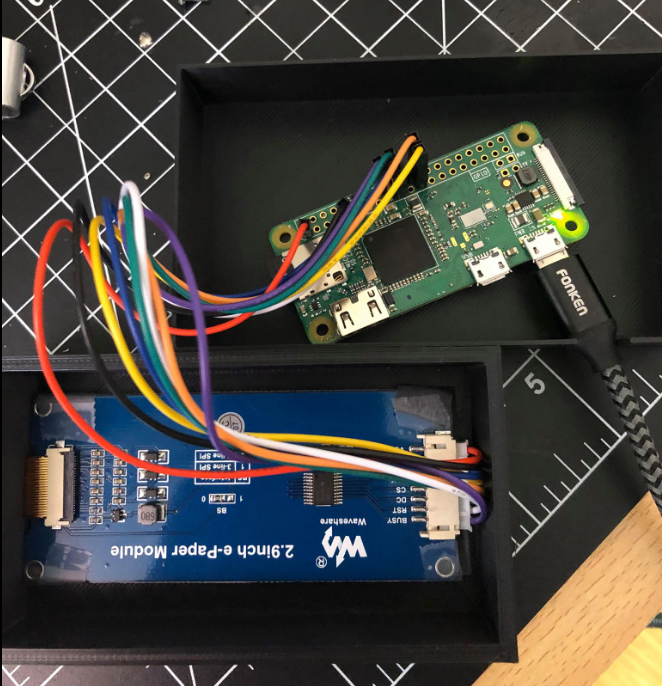
Step 1: Raspberry Pi, Meet Display
The e-ink display makes a lot of sense here because the schedule is static for long periods of time. With an LCD screen, you can run the risk of burn-in and ghosting.
Setting the raspberry pi up with the e-paper display was a straightforward bit of wiring following a tutorial. It does a much better jobs than me re-hashing it, so check it out over at instructables.
They detail exactly which wires go to which pins. There’s also a python example script there that creates an updating clock.
Step 2: Grabbing Metro-North Times
We’ll need to grab the times from the Metro-North website to display on our screen. There’s two options to go about doing this:
-
Metro-North API: This MTA resource provides a great deal of information across a variety of different transportation methods in and around New York City. This is a pretty robust solution to use if you’re incorporating this as part of something like an app or need access to super real-time data.
-
Metro-North Status: This service isn’t really meant to be queried at a high volume. However, for hacking together a project that isn’t spamming requests, it can be really quick to get up and running. I used the code written by github user oogali for this.
Step 3: Displaying the Times
I’ve reproduced the display code below – you’ll be able to see that it’s really just a merging of the two pieces of code referenced in the above sections.
	# font for drawing within PIL
	small_font = 14
	large_font = 28
	myfont28 = ImageFont.truetype("/home/pi/mtaDisplay/fonts/telegrama_raw.otf", large_font)
	myfont10 = ImageFont.truetype("/home/pi/mtaDisplay/fonts/SourceCodePro-Regular.otf", small_font)
	mainimg = Image.new("1", (296,128))
	draw = ImageDraw.Draw(mainimg)

	skip = 0 # used to slow down train sched changes, but not clock changes
	while 1:
		starttime = time.time()
		print skip
		if skip == 0:
			sched = mta.main()
			print '---------------------'
			try:
				# clear
				draw.rectangle([0,0,296,128], fill=255)

				ts = (400,small_font+1)
				print ts
				tsy = ts[1]+1
				oldy = -1
				sched_list = sched.split('\n')
				divs = 4
				for y in range(0, divs):
					newtext = '   '.join(sched_list[y].split('\t'))[:45]
					oldy = y
					draw.text((1, 1+y*tsy), newtext, fill=255, font=myfont10)
					draw.text((1, 3+y*tsy), newtext, fill=255, font=myfont10)
					draw.text((3, 3+y*tsy), newtext, fill=255, font=myfont10)
					draw.text((3, 1+y*tsy), newtext, fill=255, font=myfont10)
					draw.text((2, 2+y*tsy), newtext, fill=0, font=myfont10)

			except IOError as ex:
				print 'IOError', str(ex), imagename[0]
				pass

		#draw time
		now = datetime.datetime.now(pytz.timezone('America/New_York'))
		hour = now.hour%12
		hour = 12 if hour == 0 else hour
		tstr = ("%02d:%02d"%(hour,now.minute)).replace('0','O')

		tpx = 96
		tpy = 96
		draw.rectangle([0,tpy-12,296,128], fill=255)
		for i in range(tpy-4, tpy+32, 2):
			draw.line([0, i, 295, i], fill=255)
		draw.text((tpx  , tpy-1), tstr, fill=0, font=myfont28)
Step 4: Closing Things Up
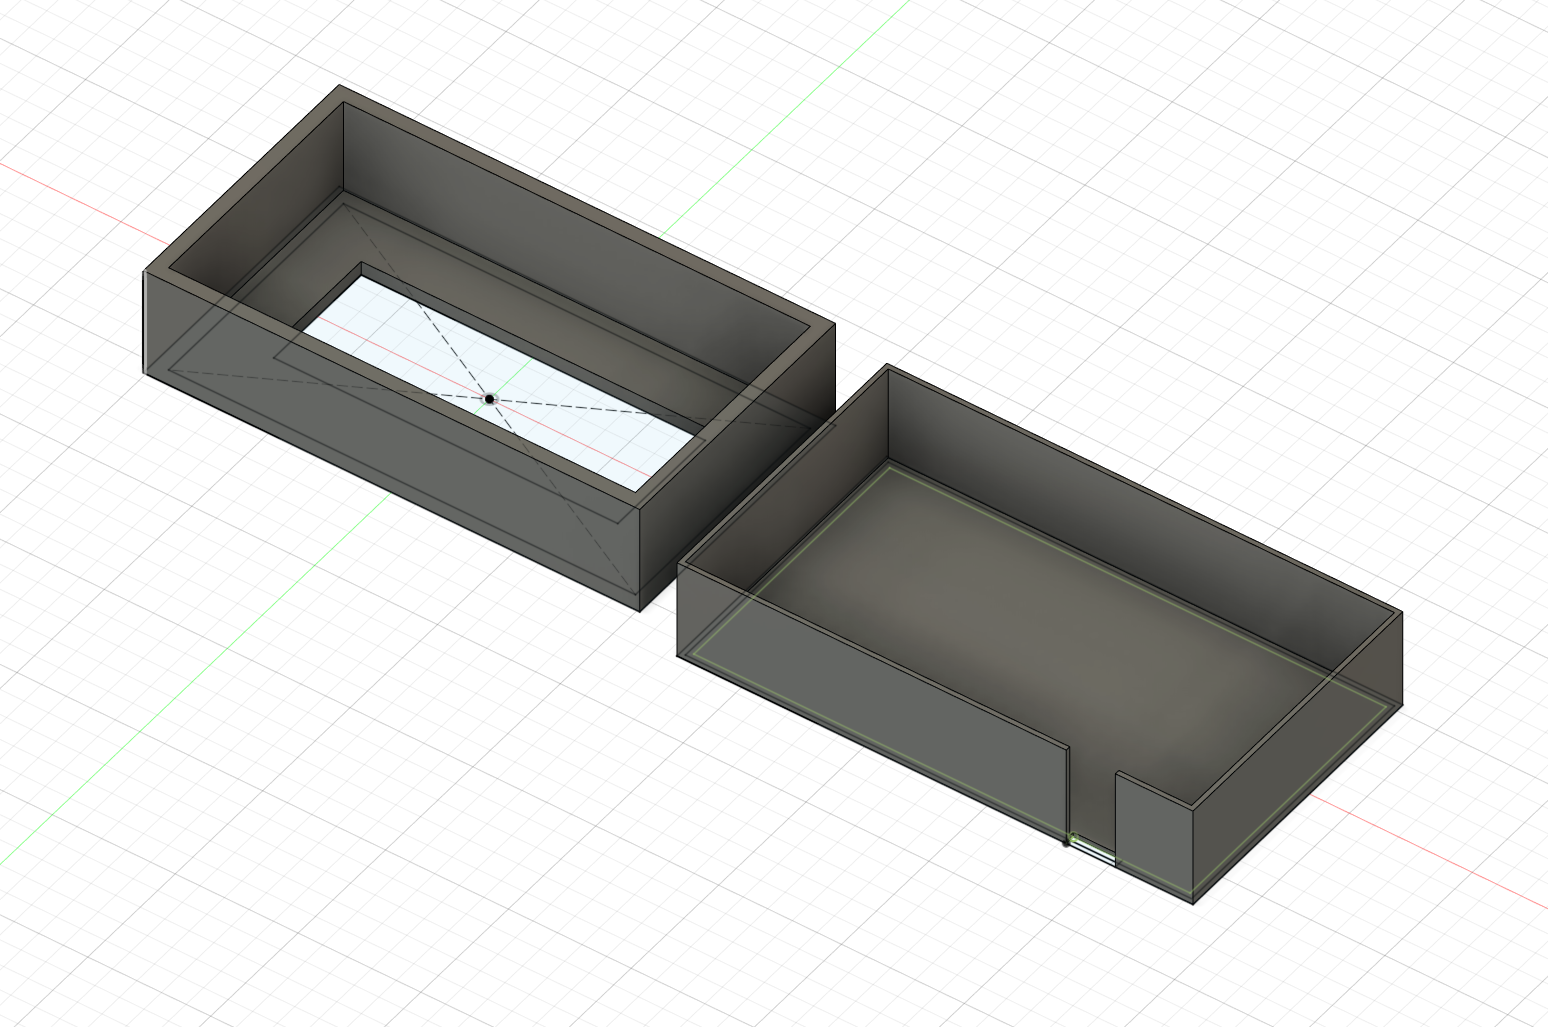
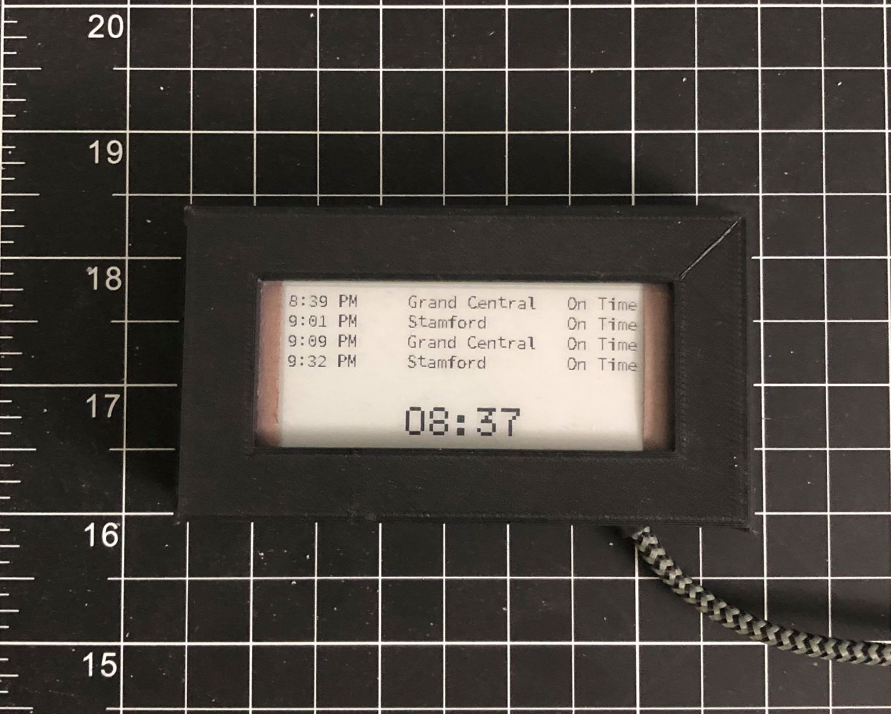
At this point, all I needed was a case. Since the whole thing is meant to capture the same blocky aesthetic as the current train displays, it was relatively straightfoward to create a rectangular box in Fusion360 and then print it on my Ender 3-D printer. I’m certainly a beginner when it comes to CAD but there wasn’t much iteration involved here. I’m making the STL file from the build available here.
I decided to use hot glue to keep the board and display fixed in the locations I wanted them. I used a dremel tool to cut a small opening for the USB power cable to make an exit from the case. Once that was done, all that it took to get it mounted was some tape to the top of my monitor giving me a clean finished product that I could glance at when the end of the day rolled around.